Follow this blog with bloglovin

Follow Sewasis

Monday, August 8, 2011

Planning Makes Perfect

I’m usually an obsessive planner.  I’m a list maker; I make master to-do lists and sub-lists filled with my most important to-do tasks.  I pretty much love everything about the planning process – but I especially love the feeling of accomplishment when I can cross off one thing after another.  Occasionally, however, I get so gung-ho about a project that planning goes out the window…and of course that’s when issues inevitably ensue. 

Fresh off the success of my faux-wrap maxi dress, I decided to whip up a strapless maxi from the deep purple jersey in my fabric stash.  By all accounts – in my mind – it was easy, effortless and I’d be done in a day with a new successful finished product to show off.  I laid my fabric on my floor and began to cut until I realized I didn’t even have enough of the fabric for a full skirt, let alone a dress.   So, that bright idea will have to be laid aside for now. 


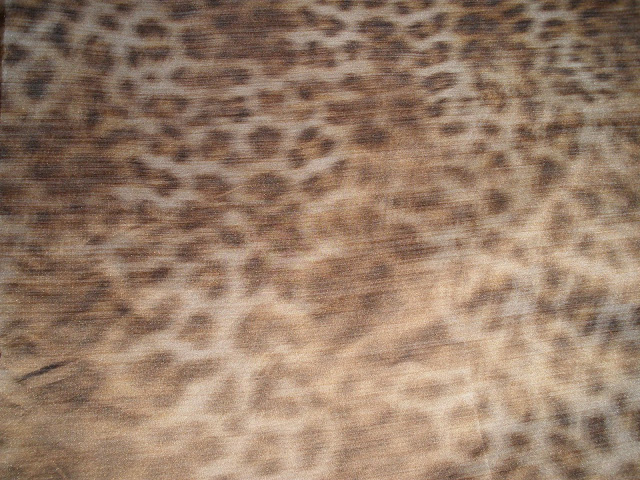
With my instant dress dreams thwarted, I turned my attention to planning my next project.  I picked up a few new fabulous fabrics from mood.  This heavy silk leopard print and white sheer cotton were unplanned impulse purchases, but I loved them both too much to pass them up.  I'm envisioning the leopard print silk as a new pair of shorts.  I've been dreaming of leopard print shorts for awhile and I love how this fabric is slightly more subtle - almost like a water color painting.  As for the sheer cotton I have no idea what I'm going to do with it yet, but I'm sure I'll come up with a good idea for it sooner or later.


My current project involves this beautiful red and white silk print and this white stretch cotton.  I'm almost done, but you'll have to wait and see!

Tuesday, August 2, 2011

Silky Summer Days

I've finished my v-neck maxi dress and I'm super happy with the results.  The fabric is an extremely light-weight sheer silk, which made it a bit difficult for me to work with.  I had to hand baste every single section before machine stitching to make sure my seams didn't slip - a time consuming process but totally worth it.


The dress is a faux-wrap with a zipper in the back.  The zipper was the biggest pain to insert because of the light-weight fabric and it took a few attempts before I eventually worked it out.  It's not perfect, but I'm still learning.


The alterations I made were a huge improvement.  I took the bodice in an inch on each side seam, changed the angle of the bodice to lower the v-neck line and reduced the size of the straps.  Now I'm off to plan my next creation!
 

Monday, July 25, 2011

Moving Forward

The past few weeks have been a whirlwind of grief at life lost, celebration of new life, and a whole lot of living in between.  No matter how much we wish we could drag our feet at times, life keeps on charging forward.  So in the midst of a whirlwind what else can one do but create, create, create.


Thank you all so much for your lovely suggestions and helping me decide on my next creation.  I've decided to go with a deep-v maxi dress with a wrap bodice using the blue and white silk print.  The fabric is so beautiful I was nervous to cut into it until I had the perfect plan and I think this is it. 


I used Butterick pattern B5486 as a template because it had the wrap bodice I wanted.  Before cutting into my real fabric, I completed a toile to check the fit and look of the dress.  Thankfully I did a test run here because after trying on the toile I needed to make a ton of adjustments.


The dress is a faux-wrap with a zipper up the back.  I didn't insert a zipper in my mock-up and instead just basted the opening together and I could still slip the dress on.  Right there I knew I needed to take the bodice in a good two inches around my waist.  The neckline needed to be lowered about two inches; you can't tell on my flat-chested form, but the current neckline is practically a turtleneck.  And finally, the straps are way too wide.  After all the alterations, I can't wait to show you all the final result!

Thursday, July 7, 2011

What Should I Make Next?

This is the first time I've hit a bit of a sewing roadblock.  I've finished my shorts, but I don't have anything lined up that I've been planning to make.  I need some help.  I've got a ton of gorgeous fabrics stashed away and more patterns than I could use in an entire year, but no one project that I'm dying to make - or maybe too many that I would like to make.  


Out of my fabric stash, I want to work with one of three fabrics next.  The first is a gorgeous light weight silk pattern.  


 The other two fabrics are both stretch knits.  The first of the stretch knits is a light salmon color and the second is a deep purple.  Out of the three, which do I work with first?  And, what do I make?  My general thoughts are:  a maxi dress with a v-neck line, a strapless maxi dress, a strapless dress like the one I made here, a long skirt, or a romper.  I've scoped out a few examples of what I envision for the final product. 

Diane Von Furstenberg Maxi Wrap Dress
 This dress is very bohemian, I love it.  Plus, I have a pattern  that I think would definitely work.  

Strapless Long Dress by Parker

This dress would be a bit more free form - no pattern - but easily doable.  I wouldn't do the shirring all the way to the natural waist, I'd want to make it more of an empire waist line.  Although, I do have a dress like this already in my closet. 

Romper Pattern by Burda Style

I have a pattern for this and could do either a full pant, or make it into a romper with shorts instead.  

Strapless Maxi Dress by Splendid

This dress would work with the stretch knits, but not the silk.  It would be a bit of a challenge to do the top - also no pattern - but I'm up for it.  It's super cute.  

Torn by Ronny Kobo Maxi Dress

I have a pattern that fits this dress perfectly, so it would be nice to not have to completely alter a pattern for once and the look and fit of the dress is beautiful.

Too many choices!  Any thoughts on what I should make next?
  

Tuesday, July 5, 2011

Fitting Shorts is Hard

Shorts are not easy, but I really really wanted them so after a few tweaks here and there I finished my tweed-looking linen shorts.  I used a salmon colored silk for the pocket lining and left the lining visible, which I like but I think I would make the pockets a bit smaller next time.  

American Apparel bodysuit, Rag & Bone blazer, shorts Made by Me, Christian Louboutin wedges


Patterns for shorts - not to mention the standard sizing for shorts and pants - are generally not built to fit most women's bodies.  Not sure why, seems counter-intuitive to me.  If I had a little less curve going on things would work out fine and dandy, but c'est la vie.  Curves present a bit of a challenge.  In my test run, I made a muslin of the shorts that pulled a bit in the front.  The pulling action is frequently the bane of my existence and I generally buy a size up in pants or shorts when shopping and then bring them to a tailor to take in at the waist.  Since I'm the tailor here, I tweaked the pattern a bit to get rid of the pull, but now I seem to have a bit of a puff.  


The silk pockets had a tendency to creep up and create even more puff in front so I created a chain with my thread to keep the pockets in place.


The chain tacks each pocket down to the inside hem and it works like a charm.  Less bunchy pockets = less poof.  


  Posing for pictures is rough work.  

Friday, July 1, 2011

Happy 4th!!!

Clothes always look better in action rather than on a dress form.   I brought out the lace top yesterday for a stop at the new beer garden in mid-town.  

American Apparel shorts, American Apparel body suit, Lace Top by Me,
Michael Kors watch, vintage pocket watch as a necklace

I hope everyone has a fabulous and sunny 4th of July weekend!!!

Tuesday, June 28, 2011

Finished Product!

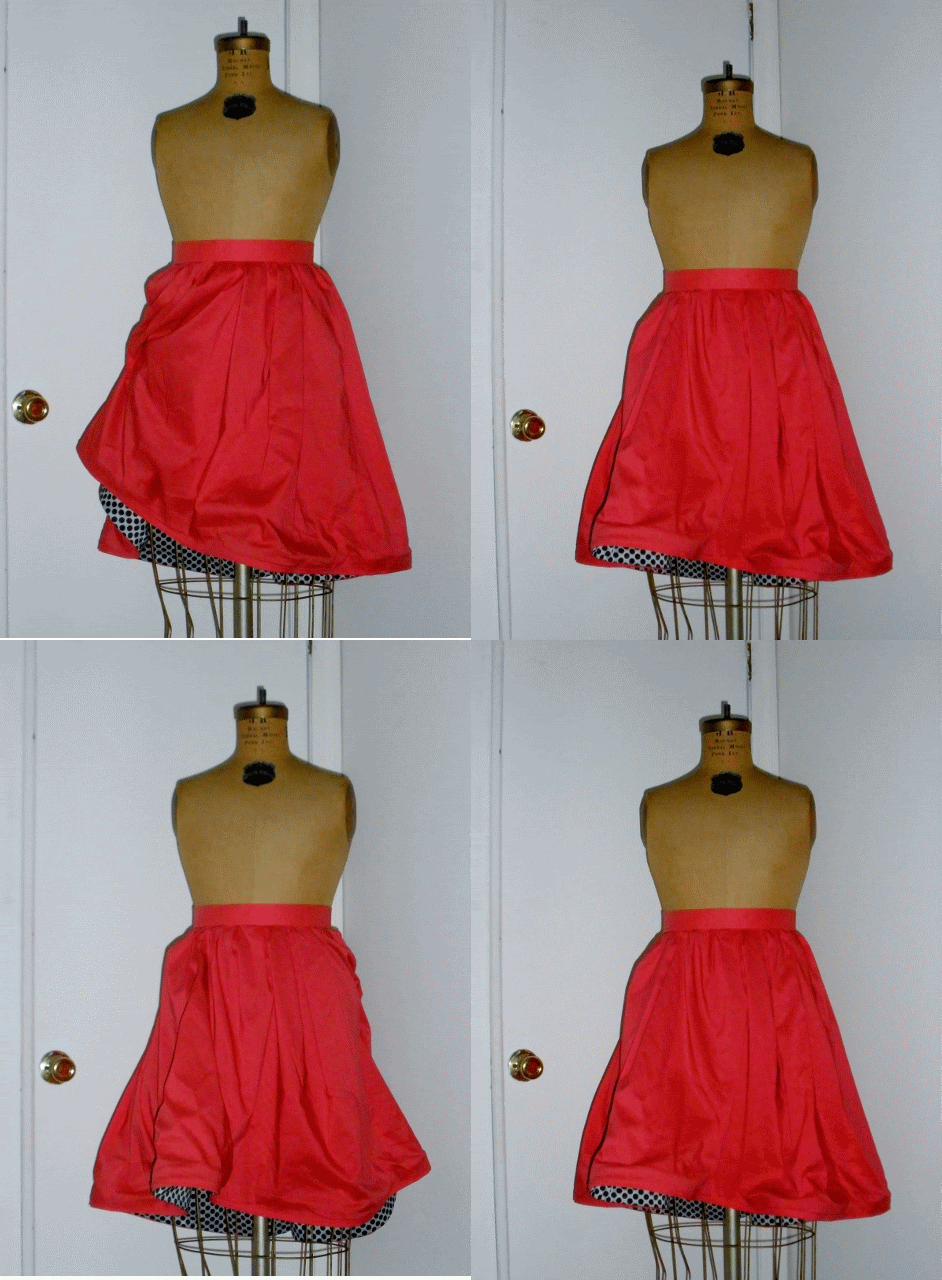
There were moments there when I didn't think I would make it, but I finally finished my skirt (first blogged about here).  After all that work the finished product turned out exactly how I wanted it.


The polka dot lining shows just enough at the bottom to make it fun, but still work wearable.  I actually wore this to work yesterday and got my first compliment by someone who didn't first know I made what I was wearing!  It even looks cute from the inside.


The hem was the most difficult part of the entire process.  This is actually the second hemming technique I used because the first technique was all sorts of wrong.  For the finished hem, I slip stitched the lining to the hem allowance on the inside so the stitches are completely hidden.  

The skirt is even better in action.  


Please excuse my poor animation skills, you can't be good at everything.  

Friday, June 24, 2011

Learning to Sew

When I first decided I wanted to learn to sew I thought I would need to take a class.  Basically, I was nervous that it would be too hard, I would be too impatient and everything I made would be - to put it succinctly - crap.  My cousin Erika, who has been sewing for quite some time and is much more talented than I, assured me that all I needed was a few books to show me the way.  So, on her guidance, I purchase a couple of excellent sewing books and stalked my fair share of sewing blogs and websites until I was ready to put needle to cloth.  

There are many many websites and blogs that have been helpful in my efforts to make beautiful things, but three in particular are a daily go-to:  

  
Gertie's Blog for Better Sewing is by far one of my favorites.  She has introduced me to so many different techniques, like the use of horse hair for the hem of my current skirt project (which I PROMISE I will show you very very soon, you can hold me to it).  Her blog contains a plethora of sewing knowledge, tips and tutorials for sewing enthusiasts of every level.


Grosgrain has a little bit of everything - actually a lot of everything - sewing, crafts, hair tutorials, you name it.  The lovely video tutorials and free pattern month with a new guest blogger and new free pattern EVERY DAY in May are just a fraction of why I love this blog.  


Tasia of Sewaholic is another must stop if you're learning to sew.  She recently started her own company selling her original sewing patterns and she gives extremely detailed and clear guides on everything from alterations to zippers.

Although I have been eyeing FIT night classes for awhile, a ridiculously busy and unpredictable work schedule makes those day dreams a little hard to fulfill.  You've got to work with what you've got, so those three blogs, plus my two trusty sewing books, are how I got my start.  Really...that's all it takes!

Wednesday, June 22, 2011

Busy Busy Busy

My sewing progress isn't moving quite as fast as I would like it to because, once again, I've been working crazy hours at THE JOB - cue ominous music, something like DUN DUN DUN.  In any case, I have faith that things will eventually slow down enough for me to lead a normal life for a little bit at least.  I may even get to take my long awaited vacation.  In the meantime, I thought I'd share a little bit of what I have planned. 


This summer I've been wanting to make shorts shorts shorts!  Well fitted fabulous shorts!  I've picked Vogue Pattern V8365 to start, view A specifically with cuffs and a flat front.  There are so many visions of shorts that I have bouncing around my head: leather, lace and boucle tweed to name a few.  For this version I think the tweed look would do quite nicely. 


Chanel's 2011 Spring RTW collection has a few examples of a boucle tweed short.  These are two of my favorite.  My version, however, will have a bit more coverage involved.  Although, the second pair above could work well - maybe on my second shorts go-around.


On my trip to the fabric store there were a number of - very expensive - boucle tweeds that caught my eye, but then I saw this lovely LINEN.  Yes, linen.  Cooler for summer, cheaper for the pocketbook and still with the tweed look I was going for.  I think they'll go perfect with my new lace shirt when they're done.

Thursday, June 16, 2011

Instant Gratification

After a very busy week, I'm still moving ahead with my skirt.  I didn't have quite enough of the polka dot fabric to complete the lining, so I had to return to Mood for more.  Unfortunately, when I got there the entire bolt of my polka dot fabric - the very last bolt of that fabric - was set aside for someone to purchase in its entirety.  Don't tell anyone, but the lovely Mood employees saved the day by letting me snag a few yards.  The whole thing should be finished soon.  In the meantime, I needed a sewing fix - something quick and relatively easy - so I decided on a lace/crochet-like top. 


The fabric I chose was very narrow, so I ended up having to attach two pieces of the lace together in order to have a piece of fabric that was long enough for my pattern.


In order to attach the lace I matched up the pieces as perfectly as possible and basted them together.  I then took a matching thread and hand sewed the two layers, following the pattern of the lace along a horizontal line


Once the two layers were sewn together, I clipped off the extra fabric on each side.  This step had to be done very carefully in order to clip as closely as possible to the point where the fabric was attached.  From up close you can see where the two pieces were joined, but from a distance it's barely noticeable.


In the end I'm very happy with the result, and it only took me two days to complete - maybe 10 hours total.  There are some alterations I may still make to the arm holes, which stretched a bit during construction.  Next time I am working with a fabric like this I will make sure to stabilize my neck and arm holes with strips of silk organza prior to cutting out the pattern so they will keep their shape better.

Monday, June 6, 2011

You Win Some, You Lose Some

On Sunday my friend Jenny and I set out for a lovely day of brunch on the UES and scoping out the Alexander McQueen: Savage Beauty exhibit at the Met.  Somewhere between brunch and the museum we were both a bit distracted, she by an amazing blush pink Luca Luca dress and me by Pretty Ballerinas, which has one of the best collections of flats I had ever seen in one place.  I picked up two pairs, a gorgeous pair of white lace-ups and a pair of square toed ballet flats in electric blue.


Unfortunately, once we made it to our destination we learned that garment bags are not allowed in the Met.  From what I could tell security had two reasons for the garment bag ban: 1) garment bags are too big and had to be checked - shopping bags filled with flats are, however, permissible - and 2) the Met considers some dresses to be art - rightfully so - and people are not allowed to bring art into the Met - the security guard sort of lost me there.  In any case, Jenny didn't really want to check her very new, very gorgeous dress, neither would I if I were her, so our McQueen visit will have to wait until another day.  I've been dying to see the exhibit, but I can't be too sad when I've got such cute new shoes.  So, after leaving the Met, we walked through the park and went to check out the art at Barneys.  

Friday, June 3, 2011

In the works...

I have two projects planned that I'm super excited about.  First up a fun yet work-appropriate skirt -- necessity meets fashion.  My vision for the skirt was inspired by practically everything that came down the runway for Louis Vuitton in Fall 2010 and the amazing Dior Couture dress below.  

     Louis Vuitton Fall 2010 RTW                                Christian Dior Spring 2009 Couture 

I love that the hemlines are structured, but still have so much movement.  I'm hoping to accomplish a similar effect through the use of a little horsehair braid.  I haven't tried that technique before, but my fingers are crossed that it will turn out anything like these gorgeous hems. 

Butterick B5285 View B
Butterick B5285 View A

As far as shape and pattern go, I think one of these versions of Butterick Pattern B5285 will get the job done.  I'm also planning on making the skirt slightly shorter in the front than in the back; although, nothing as dramatic as the Dior dress.  Quite frankly, I probably couldn't even fit the Dior dress inside any of my NYC-sized closets no matter how hard I tried.  Something that beautiful shouldn't be in a closet anyway.


Last but not least, the fabric! On the right a bright and summery cotton shirting, which I will use as my external fashion fabric.  And, on the left a fun polka dot lining to peek out just so from the gently structured asymmetrical hem.  Initially I had other plans for this bright cotton shirting, but when I saw it next to the lining fabric I just couldn't resist this combination.  

Stay tuned for project #2...

Tuesday, May 31, 2011

New Summer Dress

Follow my blog with Bloglovin

Finally, the perfect little summer dress.  I hit a few snags along the way, but I'm really happy with how it turned out.  The dress is exactly what I had imagined.  It's comfortable and light and perfect for the hot hot hot weather we've been having in the city. 


The shape of the bodice came from the pattern used in my first dress, which had a similar design.  I used only the bottom portion of the bodice pattern, stopping at the armholes and adding an inch and a half at the top for additional fabric to create a casing for the elastic needed to hold the dress in place.   

Vogue Pattern V8631

I used Vogue Pattern V8631 to get the shape of the skirt.  The pattern was perfect except for the pleats, which didn't work with the gathered concept I had in mind. To get rid of the pleats I carefully folded the pattern piece, taping the pleats down with tiny pieces of masking tape so as not to ruin the pattern.  Once the pleats were folded down, the pattern piece could be used to cut out the fabric for my gathered skirt.    


I initially planned to self-line the entire dress so I wouldn't have to deal with finishing off the hem, but I didn't have nearly enough fabric to cut out a second layer of the dress.  Instead, to finish off the very long hem I made my own bias binding by cutting strips from my left over fabric.   The strips were cut diagonally or on the bias - instead of with the grain, straight up or across the fabric - because fabric cut on the bias has more flexibility to shape around the curved hem.  I sewed each strip together and ironed them to create the folds.  I then sewed the binding to the edge of the skirt before attaching the skirt and bodice together.  Creating your own bias binding is a very time consuming process.


After testing out the finished product while running errands, I realized that gusts of wind would not be my friend in this dress.  To keep the skirt from blowing every which way I tacked it down about halfway between the hem and the waist with three tiny stitches in the hemline.  The stitches are virtually invisible from the right side of the dress.  Problem solved.  I love the end result so I just may have to create my own pleat-less pattern for future use and multiple versions of this dress.